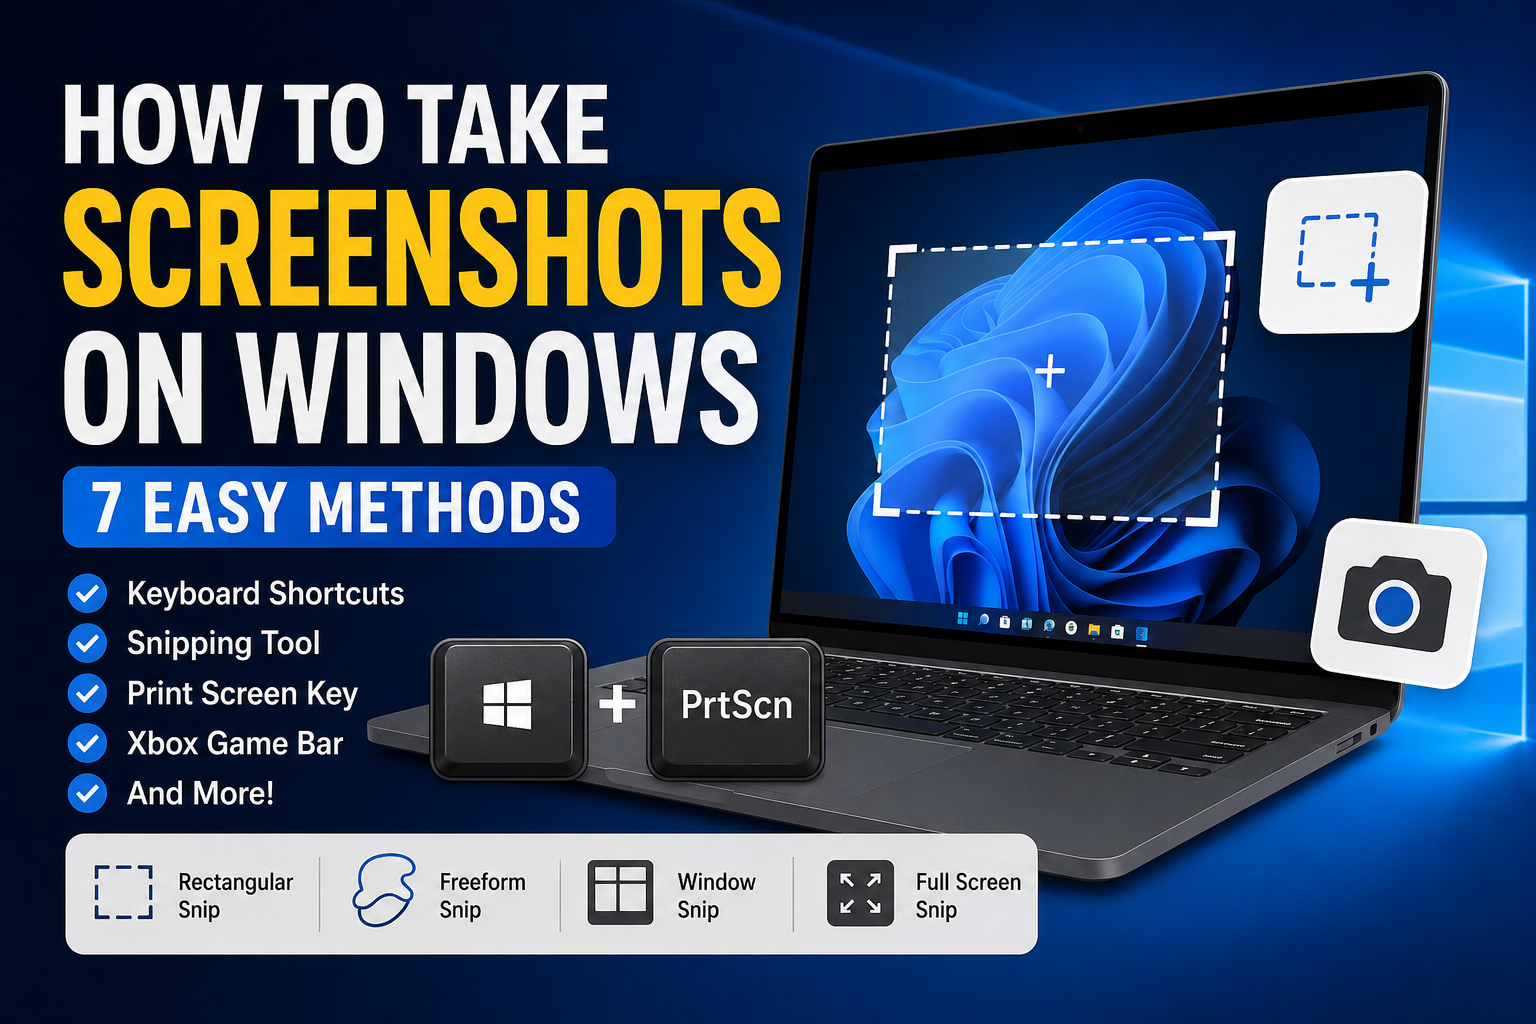
How to Take Screenshots on Windows (The Fastest Methods That Actually Save Time)
The first time I had to explain a computer problem to someone online, I made the classic beginner mistake—I pulled out my phone and took a blurry photo of my laptop screen. The image had glare, the text was barely readable, and somehow my reflection was more visible than the error message I was trying to show.
A friend replied with one sentence:
“Why didn’t you just take a screenshot?”
That was the moment I realized Windows already had everything I needed. Since then, I’ve probably taken thousands of screenshots—saving receipts, reporting software bugs, capturing online classes, sharing game scores, creating tutorials, and even remembering settings before changing them.
The funny part is that many Windows users only know one way to take screenshots, even though Windows includes several built-in tools designed for different situations.
If you’ve ever wondered which shortcut to use, where your screenshots go, or why pressing the Print Screen key sometimes seems to do absolutely nothing, this guide will save you a lot of frustration.
Why Screenshots Are More Useful Than You Think
Screenshots have become part of everyday computer use.
You might need one to:
- Show an error message to technical support
- Save an online payment confirmation
- Capture a conversation
- Save a recipe before the page changes
- Record an achievement in a game
- Keep a copy of an important document
- Share software settings with friends or coworkers
- Create tutorials or blog articles
Instead of trying to explain something with words, a screenshot lets people see exactly what you’re seeing.
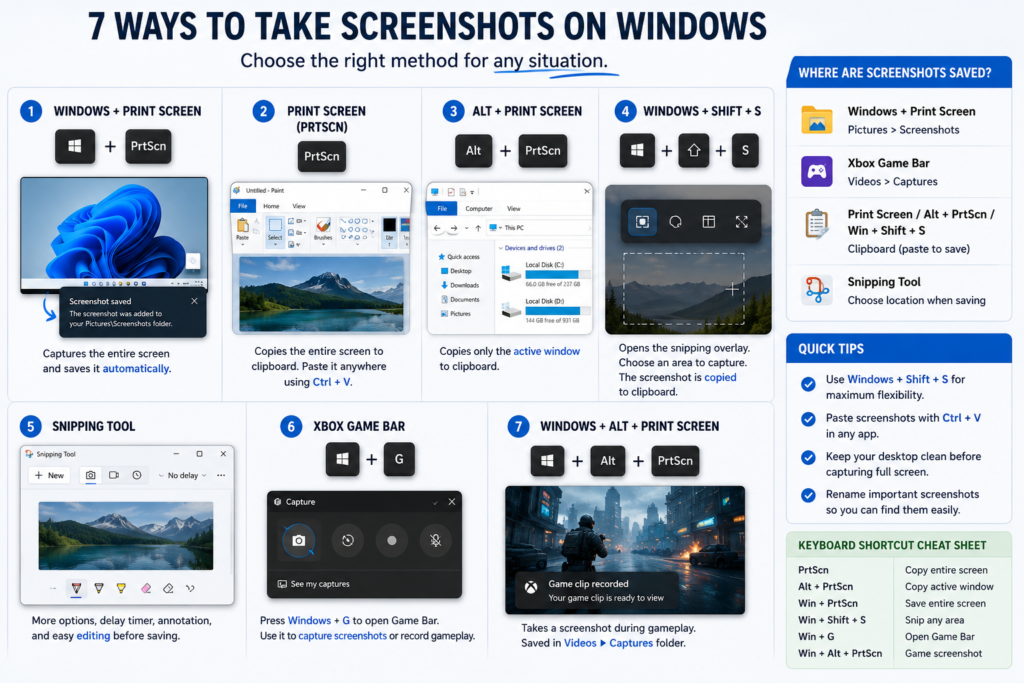
Method 1: Press Windows + Print Screen
This is the quickest method when you want to save your entire screen instantly.
Simply press:
Windows Key + PrtScn
Your screen will briefly dim.
That flash means Windows has automatically captured everything currently visible.
The image is saved without asking any questions.
You’ll usually find it here:
Pictures
   └── Screenshots
Best for
- Saving full-screen images
- Homework
- Work reports
- Online receipts
- Quick documentation
Method 2: Press Print Screen (PrtScn)
This shortcut confuses lots of people.
When you press:
PrtScn
Nothing appears to happen.
That’s because Windows doesn’t save the screenshot as a file.
Instead, it copies the screenshot to your clipboard.
You’ll need to paste it somewhere.
For example:
- Paint
- Microsoft Word
- PowerPoint
- Photoshop
- Paint.NET
- Discord
- Gmail
- WhatsApp Desktop
Simply press:
Ctrl + V
Then save it if needed.
I still use this method whenever I’m already editing an image in Paint because it’s incredibly fast.
Method 3: Capture Only the Active Window
Sometimes your desktop is messy.
You don’t want people seeing twenty open tabs or random files on your desktop.
Instead of capturing everything, Windows lets you capture only the current window.
Press:
Alt + Print Screen
Only the active window gets copied.
Paste it anywhere using:
Ctrl + V
This is one of the most underrated shortcuts in Windows.
Method 4: Windows + Shift + S (My Personal Favorite)
If someone asked me to recommend only one screenshot shortcut, this would be it.
Press:
Windows + Shift + S
Your screen becomes slightly darker.
Now you can choose exactly what to capture.
You’ll see several options.
Rectangular Snip
Drag your mouse over any area.
Perfect for:
- Error messages
- Browser sections
- Images
- Documents
Freeform Snip
Draw around any object manually.
Useful if you don’t need a perfect rectangle.
Window Snip
Click one window.
Windows captures only that application.
Full Screen Snip
Captures the entire display.
After taking the screenshot, it appears as a notification.
Click it to:
- Crop
- Highlight
- Draw
- Save
- Copy
- Share
I use this shortcut almost every day because it avoids opening extra software.
Method 5: Use the Snipping Tool
Microsoft has improved the Snipping Tool a lot over the last few Windows updates.
To open it:
- Press Start
- Search for Snipping Tool
- Open it
You’ll find options like:
- New Screenshot
- Delay Timer
- Crop
- Annotation
- Highlight
- Pen Tool
- Save
- Copy
- Share
One feature I didn’t appreciate until I started writing tutorials was the delay timer.
Sometimes menus disappear the moment you click somewhere else.
The timer gives you a few seconds before capturing the screen, making it much easier to grab dropdown menus or right-click options.
Method 6: Capture Screenshots While Gaming
Gamers usually don’t want desktop screenshots.
They want gameplay.
If you’re playing games through Xbox Game Bar, Windows already includes a shortcut.
Press:
Windows + G
The Game Bar opens.
Click the Capture button or use:
Windows + Alt + PrtScn
Your screenshots are usually saved in:
Videos
   └── Captures
This works surprisingly well for many PC games.
Method 7: Use the Snipping Tool for Screen Recording
A lot of people don’t realize the Snipping Tool now supports basic screen recording on modern versions of Windows 11.
Open the Snipping Tool.
Switch from Image to Record.
Choose the area you want.
Click Start.
It’s handy when explaining software problems or creating quick tutorials without installing another application.
Where Are Windows Screenshots Saved?
This depends on which shortcut you use.
| Method | Save Location |
|---|---|
| Windows + PrtScn | Pictures > Screenshots |
| Print Screen | Clipboard only |
| Alt + Print Screen | Clipboard only |
| Windows + Shift + S | Clipboard (save manually if desired) |
| Xbox Game Bar | Videos > Captures |
| Snipping Tool | Wherever you choose |
If you can’t find a screenshot, remember that clipboard-based methods require you to paste the image before closing or copying something else.
How to Copy a Screenshot Instead of Saving It
Sometimes you don’t actually need a file.
Maybe you’re replying in:
- Slack
- Discord
- Microsoft Teams
- Gmail
- Facebook Messenger
Use:
Windows + Shift + S
Select the area.
Then simply press:
Ctrl + V
The image pastes directly into your chat or email.
No saving required.
How to Edit Screenshots Quickly
I used to install separate editing software just to crop screenshots.
Now I rarely bother.
Windows already includes enough tools for simple edits.
You can:
- Crop unwanted areas
- Highlight text
- Draw arrows
- Add notes
- Circle important sections
For more advanced editing, I usually use:
- Paint
- Paint.NET
- Canva
- Adobe Photoshop
If you’ve just installed a fresh copy of Windows, our guide on How to Install Windows 11 for Free walks you through the complete setup process before you start customizing your PC.
Common Screenshot Problems (And Easy Fixes)
Nothing Happens When I Press Print Screen
Some laptops require you to press:
Fn + PrtScn
instead of just Print Screen.
Manufacturers often assign multiple functions to the same key.
Windows + Shift + S Doesn’t Work
Try these steps:
- Restart your computer.
- Make sure the Snipping Tool is installed and updated.
- Check Windows Update for pending updates.
- Restart Windows Explorer from Task Manager if the issue persists.
Screenshot Looks Black
This usually happens with:
- DRM-protected videos
- Streaming platforms
- Certain games using exclusive fullscreen mode
It’s not usually a problem with your keyboard.
Some protected content intentionally blocks screenshots.
I Can’t Find My Screenshot
Check:
- Pictures > Screenshots
- Videos > Captures
- Clipboard (paste into Paint)
- OneDrive if screenshot syncing is enabled
Windows may also show a notification immediately after capturing. Clicking it often opens the image before it’s saved elsewhere.
Useful Keyboard Shortcut Cheat Sheet
| Shortcut | What It Does |
|---|---|
| PrtScn | Copies entire screen |
| Alt + PrtScn | Copies active window |
| Windows + PrtScn | Saves full screen automatically |
| Windows + Shift + S | Opens Snipping Tool overlay |
| Windows + G | Opens Xbox Game Bar |
| Windows + Alt + PrtScn | Captures gameplay screenshot |
Saving this table as a bookmark—or even taking a screenshot of it—isn’t a bad idea if you’re just getting started.
Tips That Made My Workflow Faster
After years of using Windows daily, these small habits have saved me more time than any fancy software:
- Use Windows + Shift + S for almost everything.
- Keep your desktop organized before taking screenshots.
- Rename important screenshots immediately instead of leaving names like “Screenshot (53).”
- Store work screenshots in folders by project.
- Delete unnecessary screenshots every few weeks to avoid clutter.
- Use cloud storage if you regularly switch between devices.
Small habits like these make it much easier to find what you need later.
Which Screenshot Method Should You Use?
If you’re still unsure, here’s the simplest recommendation:
- Need the fastest full-screen capture? Use Windows + PrtScn.
- Need to capture only part of the screen? Use Windows + Shift + S.
- Need only one window? Use Alt + PrtScn.
- Need to record your screen? Use the Snipping Tool or Xbox Game Bar.
- Need to paste directly into a chat or email? Use Windows + Shift + S, then press Ctrl + V.
Once you get comfortable with these shortcuts, taking screenshots becomes second nature. I honestly can’t remember the last time I reached for my phone to photograph a computer screen. The built-in Windows tools are quicker, cleaner, and produce images that are actually readable. Whether you’re helping someone troubleshoot a problem, saving an important receipt, or creating your own tutorials, knowing the right screenshot shortcut can save you a surprising amount of time every single day.